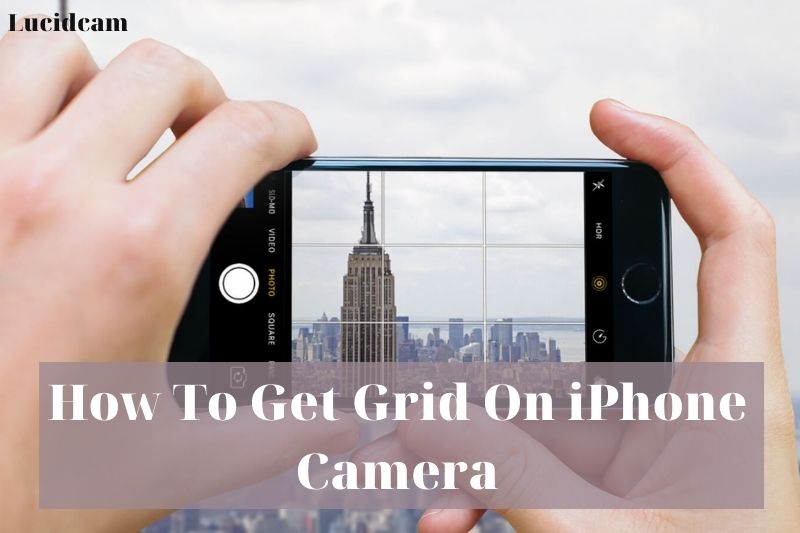
You can do a couple of things to get grid on your iphone camera. This short tutorial may teach you how to get grid on iPhone camera. This might help you compose shots and make sure your pictures are level.
Table of Contents
iPhone Photography

Digital cameras are no longer something people carry about. Nowadays, the camera world is dominated by smartphones.
In 2016, 48% of all photos uploaded to Flikr were done so on a smartphone. Apple products were used to take 47% of those pictures. It’s a wise decision.
The iPhone’s incredible cameras are well-known. The cameras on iPhones are renowned for being superb.
What is the iPhone Camera Grid?
A camera grid is a feature that splits your images into four sections using lines that cross the screen either horizontally or vertically.
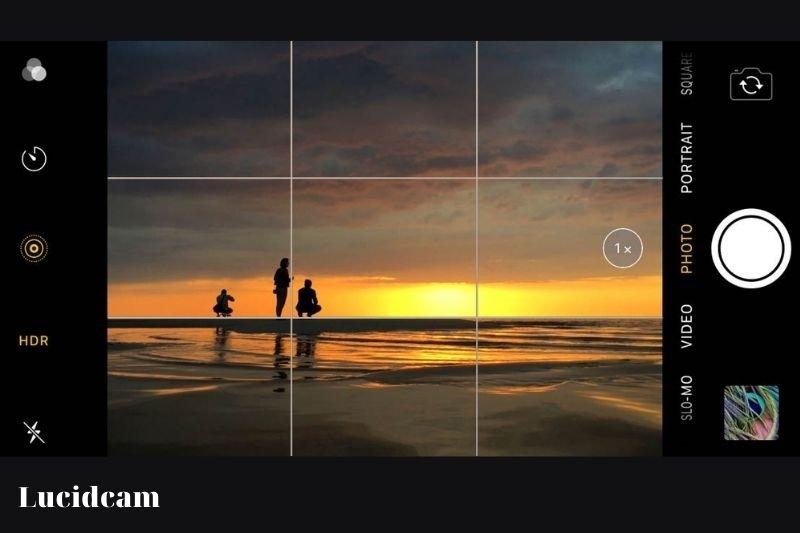
When engaged, it overlays nine squares across the screen. There is more to it than just an empty tic tac toe board.
Placing objects in photographs at the intersection of these lines can create a remarkable visual effect.
How to Turn On The Camera Grid Lines
You need to be able to use the camera grid. This is how you activate it.
Enable grid lines
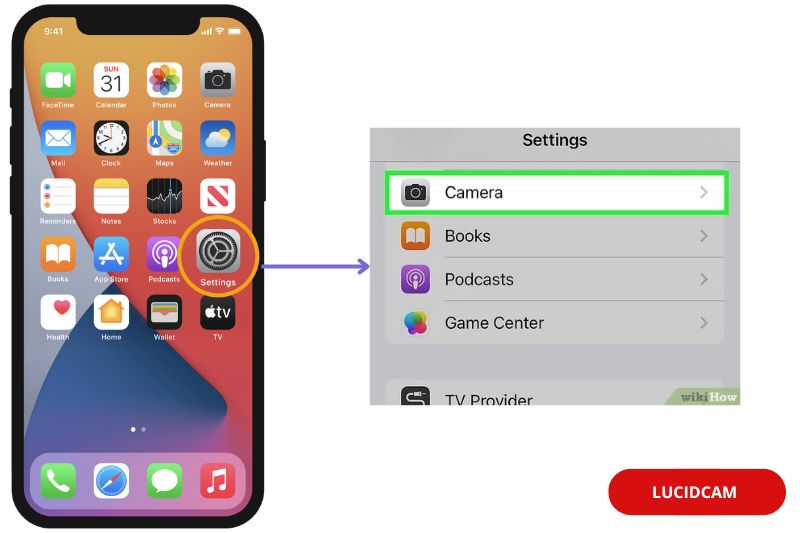
Step 1:Launch Settings app from the Home screen of your iPhone or iPad
Step 2: Tap Camera

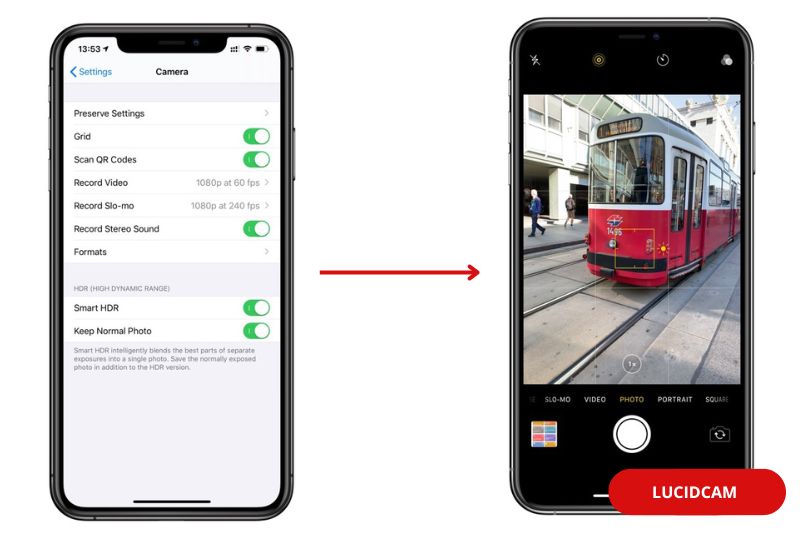
Step 3: Turn it on by selecting Grid.
Step 4: The grid will appear in the Camera app.

*If you are using an iOS version older than iOS7:
- Open Camera app
- Choose from a variety of options
- Turn Grid ON.
Rule of Thirds for iPhone
There are no unbreakable laws. The rule of threes might assist you in balancing your photographs and evoking a sense if you are new to photography.
There are nine identically sized squares in the camera grid.
According to the rule of thirds, significant compositional components and themes should be placed along or close to line intersections.
According to this criteria, the horizon line of your photograph must also coincide with either the top or bottom horizontal lines of the grid.
How to Keep The Focus On You And Your Exposure
- Start the Camera App from either your Lock screen or Home screen.
- Tap on the screen to select the area you wish to focus on, and expose it.
- To lock exposure and focus, tap and hold your focal points until an /AF Lock banner appears at the top.
- When you are ready to take your picture, tap the shutter button.
- To unlock the focus and exposure, tap anywhere on your screen.
The iPhone Camera Grid Has Many Benefits

You can make your photos more interesting with the iPhone camera grid. These are the top reasons you should use it.
It Is Based On A Technique Used By Professionals
The entire camera grid is built on the rule of thirds.
Professional photographers are familiar with this method, which has been around since the 18th century.
For the majority of photographers and artists, the rule of thirds comes naturally. Untrained iPhone photographers might not see it right away. The camera grid is useful in this situation.
It is simple to capture pictures of a professional caliber thanks to the camera grid.
According to the Rule of Thirds, your subject should line up with the grid lines in a shot that is divided into thirds using a 3 x 3 foot grid.
The photos you produce will be more striking. Now that you’re prepared, utilize an iPhone filter. It’s that easy.
It Elevates Your Photos
Using the camera grid, align things on your screen with straight lines to level your images. By correctly matching the photographs, fuzzy or uneven images can be avoided. You don’t have to rotate or adjust the angle of your photos when editing.
Landscape Photos Are Improved By The Camera Grid
For landscape photography, camera grids are extremely beneficial. It illustrates how to position the horizon to get the greatest possible shot.
The horizon should never be at the center of a picture. It is possible for anyone to achieve this. To build a scene, align interesting foreground elements with the lines.
The part of your shot that interests you the most should occupy two-thirds of the frame.
The grid makes it simple to place stuff in this manner.
It’s Easier To Frame Your Subjects

When we use our cell phones to take pictures, we frequently put the subject in the middle of the frame.
The subject should be in the center of the frame because it is the picture’s main subject.
According to experienced photographers, this is untrue. This approach is not only dull and unoriginal but also not the most effective way to communicate a topic.
To align the subject with the lines on the various sides of your screen, use the camera grid. This highlights them in subtler, more creative ways. By doing this, you can make sure that your images are at their best.
Aligning the subject’s gaze with the grid will help you capture portraits. They are frequently the most crucial component.
It Improves Photo Composition
By selecting various regions in your photos, you can activate the grid to display the precise composition of your frame. As a result, you are forced to concentrate more on the entire frame than the subject.
You can produce a more balanced image by putting objects of interest along grid lines. This will prevent the use of excessive negative space. As a result, the composition of the image is richer.
It Will Get You More Likes
You want to ensure that people see your images on social media. A camera grid is a fantastic tool for this. If you start using it, you’ll be one step ahead of everyone else.
Imaginative use of it
Use the camera grid to your advantage, but try not to become overly fixated on it.
It is there to help you, not to tell you what to do.
The rule of threes is only a general recommendation and should not be used.
The subjects don’t have to match the grid precisely. But putting them near to each other might work.
Don’t be afraid to do it your way if it doesn’t fit your image.
What To Do With Your New Photos?

With this new method, you’ll be taking stunning pictures. Print them out so you can take pleasure in your work.
- Snapfish: Get Snapfish discount coupons. The printing company Snapfish can turn your images into calendars, prints, invitations, notebooks, and other goods. The most recent shipment times are also available.
- Walgreens Photo: This is a well-liked location to print digital images in 4×6 or 4×4 sizes.
- Probably the finest website for printing images is Shutterfly.
FAQs

How can you take multiple photos on your iPhone while keeping your hands free?
Swipe the shutter button to the left on iPhone XS, iPhone XR, and subsequent models. Touch and hold the Shutter button on iPhone X and previous generations. How many shots you’ve fired are displayed by the counter.
How do I get the Grid on my iPhone 13 Camera?
- Click Settings, then select Camera.
- The Grid toggle should be turned on under Composition.
- To check if you can see the grid lines on your screen, open the Camera app.
How do I turn on grid lines on my Camera?
You tap on the Camera App. You tap on Settings from the upper left corner of the Camera App’s screen.
Scroll down to Grid Lines from Camera Settings. The Camera Grid Lines can then be activated or deactivated simply tapping on them.
How can I make my iPhone pictures look professional?
- To take steady pictures, use the camera timer.
- Adapt the exposure and focus settings.
- Limit your exposure.
- Soften the illumination.
- For pictures with a wide variety of lighting, use HDR.
- Become familiar with the suggested image sizes for various social networking platforms.
Conclusion
We hope this article will be helpful for you. If you want to know more information, you can access our website Lucidcam to learn more useful articles. Thank you for your reading!
