For steadying your images and ensuring that your pictures are clear and in focus, tripods are quite helpful. In this guide, Lucidcam will walk through the step process of how to put a camera on a tripod, including tips for ensuring a stable connection and avoiding common mistakes.
Table of Contents
- 1 Why Use A Tripod?
- 2 Here Are Some Steps To Position Your Camera Onto The Tripod:
- 3 Tips to Adjusting the Tripod
- 4 Tips for Mounting the Camera on Tripod Successfully
- 5 FAQs
- 5.1 Is a tripod mandatory?
- 5.2 How can you pan a camera mounted on a tripod?
- 5.3 What is the standard thread for a camera tripod?
- 5.4 How do you put a picture on a tripod?
- 5.5 How to set up a tripod for a landscape photograph?
- 5.6 How to set up a tripod for a portrait photograph?
- 5.7 How to place camera on tripod phasmophobia?
- 5.8 How to attach a camera to manfrotto tripod?
- 6 Conclusion
Why Use A Tripod?

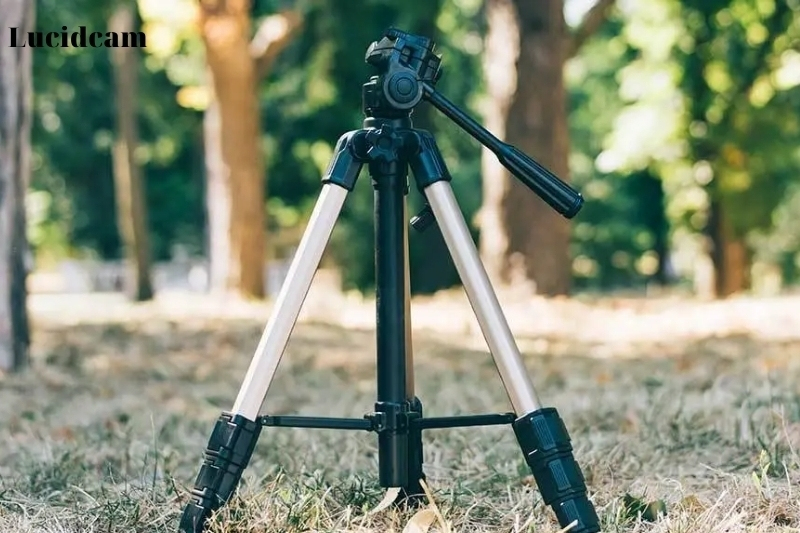
- Stability: One of the most important reasons to use a tripod is that it gives your camera steadiness. Tripods have three legs with different lengths that can be changed. This lets you change the height of your camera and keep it steady on rough surfaces. Thanks to using a tripod, you can keep your cam from shaking.
- Consistency: When taking multiple photos or videos, using a tripod ensures consistency in composition, angle, and framing. This also means you should keep the same distance and position your camera the same way during time-lapse or long-exposure photography. This will help keep your photos consistent.
- Flexibility: Tripods have many different sizes and weights, which means they can use in different situations. You can use a small for close-up shots, a medium for portraits, or a heavy-duty for outdoor photography. You can also shoot from different angles, like low or high.
- Creativity: Using a tripod can help you be creative with your photography. You can try different techniques like long exposures, bracketed shots, and panoramic photos. These techniques need the camera to stay completely still, which is only possible with a tripod.
- Comfort: Holding a camera for an extended period can be tiring and uncomfortable, especially for larger cameras or lenses. When you use a tripod, you get to rest your arms and take a break. At the same time, your camera will stay safe and stable.
Here Are Some Steps To Position Your Camera Onto The Tripod:

When it comes to using a tripod, positioning your camera onto it is a crucial step that can significantly affect the outcome of your photos or videos. Here are some steps to follow when positioning your camera onto the tripod:
1. Choose the location:
Before setting up your tripod, choose a location that provides a stable and level surface. Look for a flat surface and avoid placing your tripod on a slope or uneven ground. Also, ensure the location has enough space for you to move around comfortably.
2. Get your camera ready
Once you have chosen the location, get your camera ready by attaching the necessary lenses, filters, or accessories. Make sure the cam is turned off and that the lens cap is removed.
3. Get your tripod ready:
Extend the legs of the tripod and adjust them to the desired height. Many tripods have legs that can adjust to different angles and lengths. This helps you customize the tripod to suit your needs. Make sure the tripod is stable and secure by tightening the leg locks.
4. Verify Your Equipment’s Compatibility
Most cameras these days can be securely attached to a tripod. Make sure your tripod is on the bottom of the camera twice, as there are different type of tripods. Usually constructed of metal, this small recess has screw threads.
For some cameras, especially the smaller versions, it’s not necessary. You should review the mount’s specifications, as there can be many different types of tripods. It’s harder for DSLRs to fit into a standard mount than it is for a tripod.
5. Install the Camera Plate
The camera plate is a small rectangular or circular piece of metal that is attached to the bottom of your cam. It usually comes with the tripod or can be purchased separately.
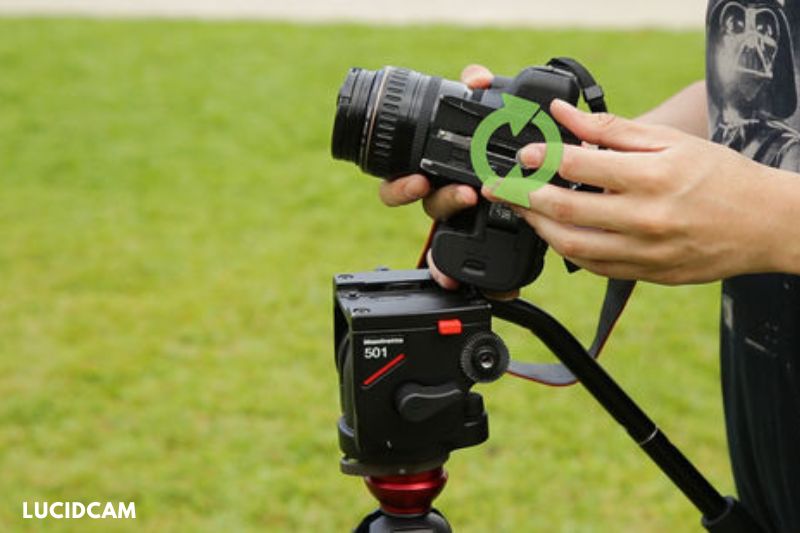
The camera plate is used to attach your camera to the tripod head. To install the plate, remove the mounting screw from the tripod head and screw in the camera plate.
6. Level the Tripod
After installing the camera plate, make sure that the tripod is level. Use the built-in bubble level on the tripod head or an external bubble level to check if the tripod is level. Adjust the legs of the tripod accordingly until it is level.
7. Set the camera on the Tripod to the desired setting.
After making the tripod level, place the camera on top of it and change its position until you are satisfied. You can move the cam up or down or side to side by tilting or turning the tripod head.
8. Click on your image
After positioning the cam on the tripod, you are now ready to take pictures or record videos. Use the camera’s self-timer or a remote shutter release to avoid camera shake when taking pictures. Take test shots to ensure that your camera is properly positioned and that your shots are level and steady.
Tips to Adjusting the Tripod

- Adjust the height and legs of the tripod: Ensure the tripod is set to the appropriate height for your desired shot. Adjust the legs of the tripod to ensure it is stable on uneven surfaces.
- Ensure that the tripod is level: Use a spirit level to check the levelness of the tripod. Adjust the legs until the bubble in the spirit level is centered.
- Adjust the angle and tilt of the camera: To get the shot you want, you might have to change the camera’s angle and tilt. Use the knobs or levers on the tripod head to make these adjustments.
- Balance the camera to prevent it from tipping over: A balanced camera is less likely to tip over or shift during the shot. Adjust the tripod head and camera plate to achieve a balanced position. You can also use a counterweight to help balance the camera if necessary.
- Use a remote trigger or self-timer: Use a remote trigger or a self-timer to take the picture without touching the camera. This will keep the camera from moving.
Tips for Mounting the Camera on Tripod Successfully

- Choose the right tripod: Ensure the tripod you choose is sturdy and can support the weight of your cameras and lens. Look for a tripod with a weight capacity that exceeds the weight of your camera setup.
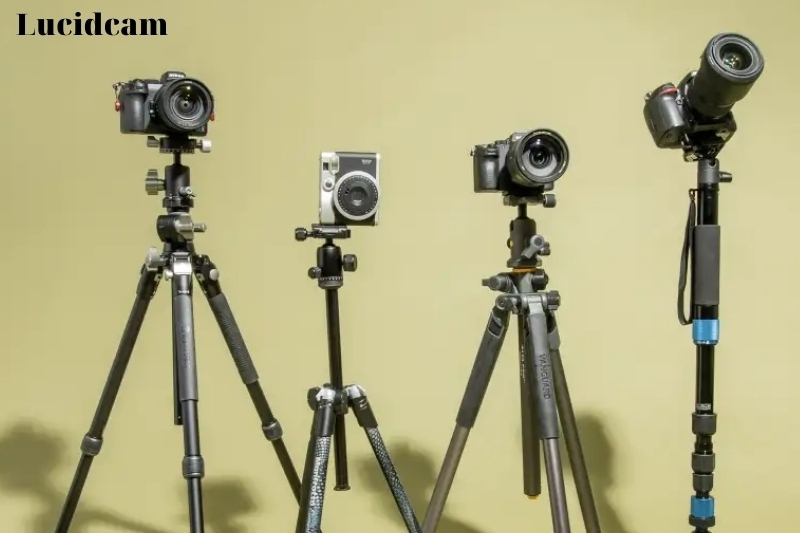
- Choose the right tripod head: There are different kind of tripod heads, including ball heads, pan-and-tilt heads, and gimbal heads. Each type of head provides different features and advantages, so choose the tripod that fits your needs and shooting style.
- Use a quick-release plate: A quick-release plate allows you to quickly attach and detach your camera from the tripod head. Make sure the plate is compatible with your camera and tripod head.
- Use a level: Use a built-in or external bubble level to ensure that your tripod is level. This will help prevent crooked shots and make it easier to pan and tilt the camera smoothly.
- Use a remote shutter release: A remote shutter release or self-timer can help eliminate camera shake when taking pictures. This is especially important when using slower shutter speeds or when shooting in low light.
- Use a cable release: A cable release allows you to trigger the shutter without physically touching the camera. This can help eliminate camera shake caused by pressing the shutter button.
- Use a weight or sandbag: Use a weight or sandbag to stablilize the tripod, if your tripod is not stable enogh. This help prevent the tripod from tipping over and causing daamage to your cam
Read more: How To Use A Gimbal Tripod Head
FAQs

Is a tripod mandatory?
The answer to The question was about when exactly a tripod is needed. Your answer is no, you must have a tripod.
A tripod is needed to be more flexible when taking close-up shots, using a slower shutter speed and a dark background.
If you need to attach a telephoto lens to your camera, a tripod can be a great help. A travel tripod is a great tool for capturing short, stunning moments.
How can you pan a camera mounted on a tripod?
You will find a threaded hole at the camera’s bottom. The tripod mount (camera plate) should be matched if your cam screws directly to the tripods. Once the pieces are joined, twist them together. A few tripods have a screw-head under the plate.
What is the standard thread for a camera tripod?
The current ISO 1222:2010 tripod bolt thread standard specifies a 1/4-20 UNC or 3/8-16 UNC thread for connecting the camera. 1/4-20 UNC threads are present on the majority of consumer cameras.
How do you put a picture on a tripod?
There are usually three legs on a tripod, and each leg has a screw. To attach the camera to the tripod, you will need to find the mount on the bottom of the camera.
There is usually a disk with a screw in the center. Line up the mount on the tripod for camera with the mount on the camera, and then screw them together.
How to set up a tripod for a landscape photograph?
- How to shoot vertical with your tripod
- Don’t force it
- Let go of the tripod
- Make sure everything is locked down tight
- Empty the water out of the tripod legs
How to set up a tripod for a portrait photograph?
- Starting with the broader top parts, extend the legs.
- Place the tripod so that one of its legs is facing in the lens’s direction.
- To level the tripod, change the length of the lowest leg portions.
- Use a penny to tighten the baseplate after attaching it to the camera.
- the tripod head with a click or clamp.
How to place camera on tripod phasmophobia?
A video camera can be mounted on a tripod by being picked up and placed (default: F on keyboard) on top of the tripod.
The player does not need to transport both an empty tripod and an unmounted video camera because carrying the tripod thereafter also includes the camera.
How to attach a camera to manfrotto tripod?
- Explicit Tripod Legs
- Remove the Fluid Head’s Quick Release Plate.
- Attach the camera or audio recorder to the quick-release plate.
- Suspend the camera from the head.
- On the head, center the camera.
- Remove the Head’s Camera/Audio Recorder.
- To position, the camera, use the Pan and Tilt buttons.
Conclusion
The guide we mentioned before is provided to you here. In some situations, it is really helpful. We anticipate that it will be simpler for you to mount your camera on tripods once you have grasped it.
You are welcome to ask me directly if you still have any questions. Share this article with your friends if you like it. I appreciate your reading.
