This post will show you how to operate and position your Blender Camera. Lucidcam have a How To Move in Blender post that will show you how to move about in 3D space.
Table of Contents
Viewport vs. Camera
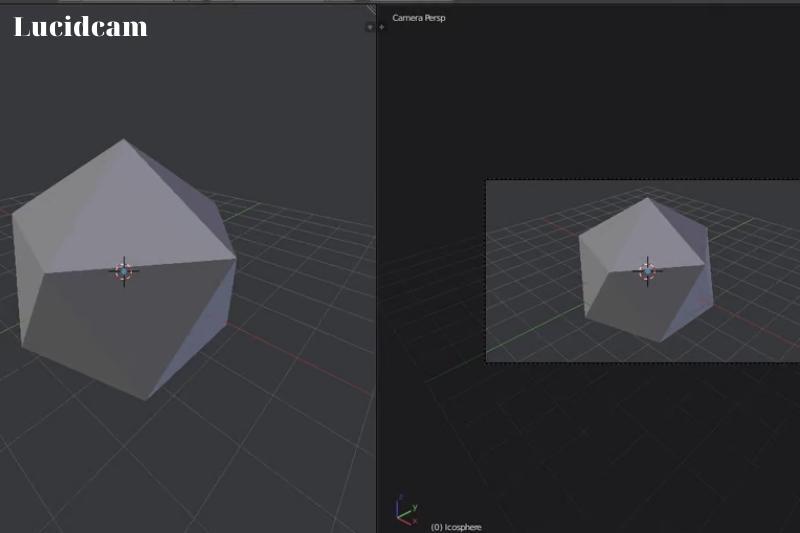
You may get confused when working in Mixer. This is understandable as the viewport can be viewed as a virtual camera, and a cam object may be used as a viewer. These are the differences and what they look like.
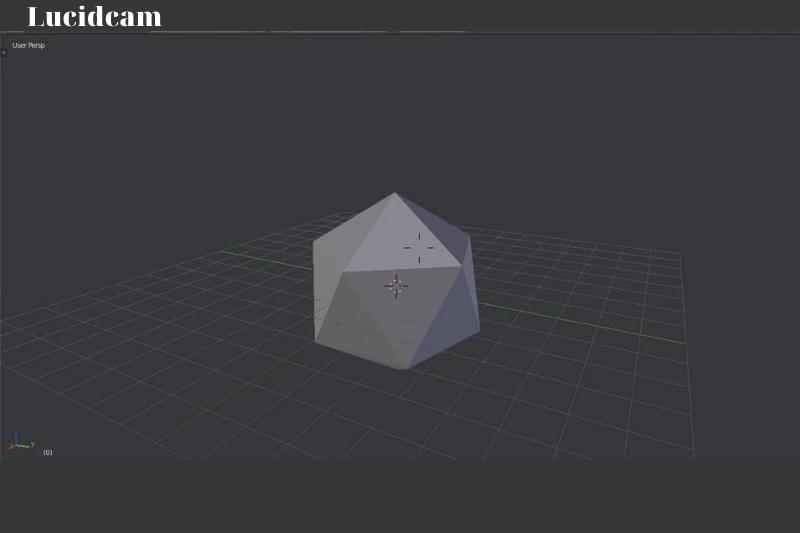
The main view the user sees when starting Blender is the viewport (see the above image). The viewport isn’t an object. It’s more like a window that lets you look around the scene that includes your model.
It is part of the Blender interface and used only for viewing and developing the model. It is not used in rendering.
A cam must be added to the scene or created. Specifically, anything it’s pointed at will be part of the rendered image. It will render any object it points at. Camera objects are not meant to be moved as easily and are therefore not suitable for development.
How to Add A Camera
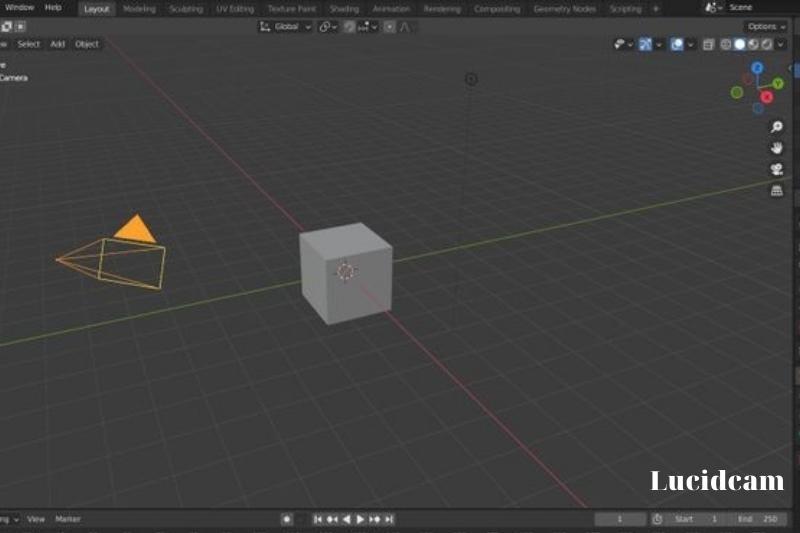
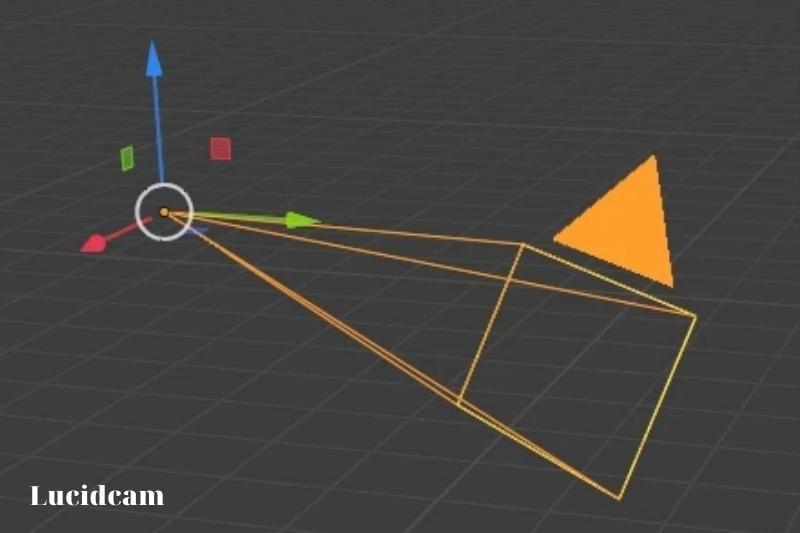
The pyramid-shaped object is visible in the above image. This is the camera object. These objects, just like a real camera object, define the perspective and location from which you will render your scene.
The arrow points away from the base of the camera, while the pyramid’s point is the back. Its base is its lens. The arrow indicates which edge is the top.
- These steps will help you create a cam.
- To open the Add menu, press Shift
- Move your mouse to hover over the Cam and then click left.
- Hit the Enter key button with Camera highlighted
You should now have a new camera object right where the 3D cursor is. To switch to view, press 0. To refresh your 3D cursor press Shift+. The 3D cursor acts as a target, indicating where new objects will be placed.
How to Move Camera In Blender
Viewport Controls
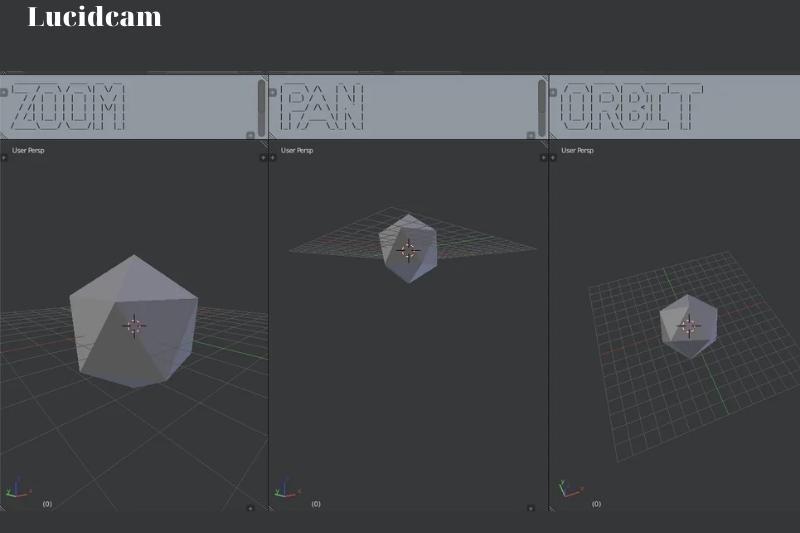
Blender is a powerful 3D creation software that allows users to manipulate objects and scenes in a variety of ways. Moving the camera is an essential skill in creating captivating and dynamic visual content. Here are some ways to move the camera in Blender using the viewport controls:
- Zoom: Zooming allows you to get a closer or farther view of the scene. To zoom in, simply scroll the mouse wheel upwards while the cursor hovers over the viewport. To zoom out, scroll the mouse wheel downwards. Alternatively, hold down the Ctrl key while scrolling the cursor across the screen by pressing the mouse button and pushing the mouse wheel button.
- Orbit: Orbiting allows you to rotate your view around the center of the scene. To orbit, hold down the middle mouse button while moving your cursor through the viewport. Make sure your cursor is in the viewport before holding down the middle mouse button.
- Pan: Panning allows you to move the entire scene around the viewport in any direction. To pan, hold down the Shift key and the middle mouse button while moving your mouse across the viewport. Like orbiting, panning requires your cursor to be within the viewport before holding down the keys.
It is essential to note that the viewport controls only work with the viewport, and if you want to move the camera, you should use a different method. Additionally, if you don’t have a scroll wheel or a scroll wheel button, you can consult the Blender manual for information on how to emulate the scroll wheel, also known as the third mouse button.
One crucial tip for using these viewport controls is to be careful with the active camera setting. You can easily lose your camera positioning if it is not active.
Therefore, it is recommended that you turn on the active camera setting, position your camera, and then turn it off to ensure that it is active.
In summary, moving the camera in Blender using the viewport controls involves zooming, orbiting, and panning. These motions are easy to execute and allow for flexible control of the camera’s position and view. By following these tips, users can create stunning and dynamic visual content with Blender.
Direct Controls (Camera Only).
Here are the steps to use Direct Controls to move your camera in Blender:
- Select the camera object in your scene by clicking on it. You can also select the camera from the Outliner if it’s not visible in the viewport.
- Switch to the 3D Viewport and press the “N” key to open the Properties Panel on the right side of the screen.
- In the Properties Panel, select the “View” tab, then scroll down to the “View Lock” section.
- Uncheck the “Lock Camera to View” checkbox to disable viewport navigation. This ensures that your camera position won’t be affected by any viewport movements.
- With the camera selected, press the “G” key to activate the Grab tool. You can now move the camera around by dragging it with your mouse or using the arrow keys on your keyboard.
- To rotate the camera, press the “R” key to activate the Rotate tool. You can now drag the camera to rotate it around its axis.
- To adjust the camera’s field of view, select the camera object and go to the Properties Panel again. This time, select the “Object Data” tab and scroll down to the “Lens” section. Here you can adjust the focal length of your camera’s lens to zoom in or out.
- Once you have made the necessary adjustments, you can re-check the “Lock Camera to View” checkbox to reactivate viewport navigation.
Direct Controls provide more precise camera movement in Blender, making it easier to achieve the exact camera position, rotation, and field of view you need for your project. With a bit of practice, you’ll be able to use these controls to fine-tune your camera movements and capture the perfect shot.
First-Person (Viewport/Camera)
Another method for moving the camera in Blender is through the use of first-person controls, which allows for easy movement through the viewport. This method is very similar to those found in many video games and is a quick and intuitive way to navigate your scene. Here are the steps for using first-person controls in Blender:
- First, access the preferences menu located at the top of the screen under “Edit“.
- Click on “Keymap” and then type “Fly” in the name search box.
- Select the default shortcut box.
Once you have done this, you can begin using the first-person controls. To activate the controls, press Shift+F or Shift+ Grave key (that’s Shift+`). This will bring up the first-person view, allowing you to move around your scene using your mouse and keyboard.
In first-person view, you can use your mouse to rotate your view and your keyboard to move forward, backward, side-by-side, up, down, and sideways. You can adjust the speed of your view by scrolling your mouse wheel.
When you’re done looking around or have adjusted your view to the desired position, you can press Enter or Left-click to exit your first-person view. Once you exit, your current viewport and cam view will be saved, and you can move it using one of the other two methods discussed earlier.
Using first-person controls is a quick and intuitive way to move around your scene, and it can help you continue modeling from a different angle.
Whether you are new to Blender or an experienced user, mastering these different camera movement techniques can help you work more efficiently and achieve better results in your projects.
Moving Camera with Transforms
Another way to move the camera in Blender is by using transforms. This method is similar to how you would move any other object in 3D space. You can use the move tool (shortcut key: G) or the rotate tool (shortcut key: R) to adjust the position and orientation of the camera.
To move the camera using the move tool, select the camera object in the scene, and press the G key. This will activate the move tool, and you can then move the camera by dragging the mouse in the viewport.
You can move the camera along any axis by pressing the corresponding shortcut key: X for the X-axis, Y for the Y-axis, and Z for the Z-axis. Alternatively, you can move the camera along a diagonal by dragging the mouse while holding down the Ctrl key.
Similarly, to rotate the camera, select the camera object and press the R key. This will activate the rotate tool, and you can then rotate the camera by dragging the mouse in the viewport.
You can rotate the camera along any axis by pressing the corresponding shortcut key: X for the X-axis, Y for the Y-axis, and Z for the Z-axis.
In addition to using the move and rotate tools, you can also set the camera’s location using the Properties Editor’s properties. This method allows you to make precise adjustments to the camera’s position and orientation, and it can be especially useful when working in the camera view.
To access the camera’s properties, select the camera object in the scene, and then navigate to the Properties Editor. From there, you can adjust the camera’s location, rotation, and other properties as needed.
Finally, it’s worth noting that you can move and rotate the camera around its local axis using the double-click method. Simply double-click the axis button (e.g., the X-axis button) to switch to local mode, and then press the G or R key to move or rotate the camera around its local axis.
To zoom in or out on the camera’s view, press G and then Z twice. This will activate the zoom tool, and you can then zoom in or out by dragging the mouse in the viewport.
Move Camera To View
Moving the camera to the view is the final method of moving the camera in Blender. This method is very similar to the first method, but the process is reversed.
Instead of moving the viewport, you move the camera to the current view. The first step is to align your view to the location where you want to place the camera.
This can be done by selecting the camera view in the viewport and navigating to the desired location using the navigation tools described in the previous methods.
Once you have the view you want, press “Ctrl+Alt+Numpad 0” to align the active camera to the current view. This will automatically move the camera to the location of your view.
It is important to note that this method only works with the active camera. If you have multiple cameras in your scene, you will need to select the camera you want to move first by right-clicking on it in the outliner or viewport and making it the active camera.
Once you have selected the camera you want to move, follow the same steps to align it to your view.
This method is useful if you want to quickly set up a camera shot without having to manually position the camera using the transform tools. It can be especially useful when you want to match the view of the camera to an existing object or scene.
FAQs

1. How can I manipulate Blender’s camera freely?
Scroll the mouse wheel up and down to zoom in or outside the viewport. Second, move your cursor up or down on the screen by holding down Ctrl, and the mouse wheel button.
2. How can I move the blender Mac camera?
Navigate the viewport using the middle mouse button (scroll wheels) and move your mouse. The shift will zoom in and shift out. To move camera objects, press “N”, locate the view section, and then check “lock camera view“. To go into viewport navigation, press the number pad 0, then.
3. How do I move the camera in blender Wasd?
4. How can I get out camera view in the blender?
You can hit MMB to activate panning. The view will then exit from the camera view.
Conclusion
In conclusion, Blender is a powerful 3D modeling and animation software that allows users to create stunning visual content. Moving the camera in Blender is a fundamental skill that every user must learn to create engaging and dynamic scenes.
By mastering the camera movement techniques in Blender, you can create compelling visuals that tell your story effectively. So, take your time to practice and experiment with the camera movement tools in Blender and unleash your creativity.
